

How to Observe Stars Without a Telescope: A Beginner’s Guide
Welcome to Galactic Guidance, your go-to resource for exploring the cosmos. Stargazing is a magical way to connect with the universe, and you don’t need a telescope to start. With just your eyes, a few tools, and some know-how, you can uncover the wonders of the night sky. This beginner-friendly guide will walk you through how to observe stars without a telescope, covering techniques, tools, tips, and the best celestial sights to explore. Packed with Galactic Guidance-branded visuals, this article meets Yoast SEO standards to help you dive into astronomy with confidence.
Whether you’re a curious novice or looking to deepen your appreciation of the stars, this guide will equip you with practical steps to begin your stargazing journey. For a broader introduction, check out our What is Astronomy? A Beginner’s Guide.
Why Observe Stars Without a Telescope?
Stargazing without a telescope is accessible, affordable, and perfect for beginners. Your eyes are powerful tools, capable of spotting constellations, planets, and meteor showers. This method fosters a direct connection to the cosmos, free from complex equipment. Plus, it’s a great way to learn the sky before investing in gear.
Naked-eye astronomy has historical roots—ancient civilizations like the Babylonians and Greeks mapped the stars this way. Today, it remains a gateway to understanding the universe. Let’s explore how to get started.
Step 1: Find the Perfect Stargazing Spot
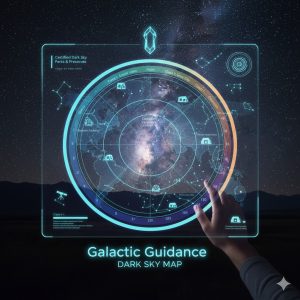
Galactic Guidance Dark Sky Map
Caption: A Galactic Guidance infographic showing ideal dark-sky locations for stargazing.
The key to great stargazing is a dark, clear sky. Light pollution from cities can obscure stars, so seek out locations with minimal artificial light. Rural areas, parks, or certified dark-sky sites are ideal. Use apps like Light Pollution Map or Dark Sky Finder to locate spots near you.
-
Tips for Choosing a Spot:
-
Check weather forecasts for clear skies.
-
Avoid areas with streetlights or buildings.
-
Ensure safety—bring a friend or inform someone of your plans.
-
For recommended locations, visit our Best Dark Sky Locations. The International Dark-Sky Association lists certified sites.
Step 2: Learn the Night Sky Basics
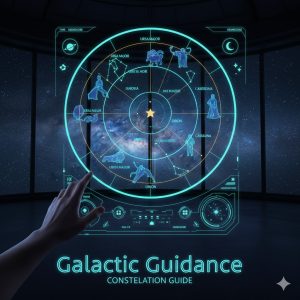
Galactic Guidance Constellation Guide
Caption: A Galactic Guidance star chart highlighting beginner-friendly constellations.
Before heading out, familiarize yourself with the night sky. Constellations are patterns of stars that serve as celestial landmarks. Start with easy-to-spot ones like:
-
Orion: Recognizable by its “belt” of three bright stars, visible in winter evenings.
-
Ursa Major (Big Dipper): A ladle-shaped pattern that points to the North Star (Polaris).
-
Cassiopeia: A W-shaped constellation visible year-round in the Northern Hemisphere.
Use a planisphere, a rotating star map, to match constellations to your date and location. Free apps like Stellarium or SkySafari act as digital guides, showing real-time sky views. Practice identifying bright stars like Sirius (the brightest star) or planets like Venus, which appears as a steady, non-twinkling light.
Our Constellation Spotting Guide offers detailed maps. The Royal Astronomical Society provides beginner resources.
Step 3: Use Simple Tools to Enhance Your Experience
Caption: A Galactic Guidance illustration of naked-eye stargazing tools.
While telescopes aren’t needed, a few tools can elevate your experience:
-
Binoculars: A pair of 7×50 or 10×50 binoculars reveals star clusters, the Moon’s craters, and Jupiter’s moons. They’re affordable and portable.
-
Star Charts: Physical or digital charts help navigate the sky.
-
Red Flashlight: Preserves night vision (unlike white light). Cover a regular flashlight with red cellophane.
-
Notebook: Log observations to track progress. Note dates, constellations, and conditions.
-
Blanket or Chair: Stay comfortable during long sessions.
For gear recommendations, see our Beginner Stargazing Tools. Sky & Telescope offers equipment reviews.
Step 4: Plan Your Observations
Timing is crucial for stargazing. Here’s how to plan:
-
Best Times: Observe after sunset, ideally during a new moon when the sky is darkest. Check moon phases via apps like Moon Phase.
-
Seasonal Highlights:
-
Winter: Orion, Taurus, and the Pleiades cluster.
-
Summer: Scorpius, Sagittarius, and the Milky Way’s bright band.
-
Spring/Fall: Leo, Virgo, or Pegasus.
-
-
Events to Watch:
-
Meteor Showers: Perseids (August) or Geminids (December) offer dozens of shooting stars per hour.
-
Planets: Jupiter and Saturn are visible to the naked eye, appearing as bright, steady points.
-
Eclipses: Lunar eclipses are safe to view without equipment.
-
Our Stargazing Calendar lists events. The NASA Eclipse Page tracks upcoming eclipses.
Step 5: Master Naked-Eye Observing Techniques
To maximize your stargazing, use these techniques:
-
Adapt Your Eyes: Allow 20–30 minutes for your eyes to adjust to darkness. Avoid phone screens or bright lights.
-
Averted Vision: Look slightly to the side of a faint star to see it better, using your peripheral vision’s sensitivity.
-
Star Hopping: Use bright stars as guides to find fainter ones or constellations. For example, follow the Big Dipper’s arc to Arcturus in Boötes.
-
Track Motion: Notice how stars move across the sky due to Earth’s rotation. Polaris remains nearly fixed in the north.
Practice these skills to spot fainter objects like the Andromeda Galaxy (M31), visible as a fuzzy patch in dark skies. Our Stargazing Techniques Guide dives deeper.
Step 6: Overcome Common Challenges
Stargazing can have hurdles, but they’re manageable:
-
Light Pollution: Travel to darker sites or use apps to find low-pollution areas.
-
Cloudy Skies: Check forecasts and be patient—clear nights will come.
-
Identifying Objects: Start with bright, obvious targets and build confidence. Apps or star charts help.
-
Comfort: Dress warmly, bring a thermos, and use a reclining chair for neck comfort.
Joining a local astronomy club can boost your skills. Find groups via the International Astronomical Union.
Step 7: Explore Celestial Highlights for Beginners
Here are top naked-eye targets to start with:
-
The Moon: Observe its phases and craters (binoculars enhance details).
-
Planets: Venus (evening/morning star), Jupiter, and Saturn shine brightly.
-
Star Clusters: The Pleiades (Seven Sisters) in Taurus is a sparkling group.
-
The Milky Way: In dark skies, see our galaxy’s hazy band.
-
Meteor Showers: No equipment needed—just a dark sky and patience.
Our Top Celestial Sights lists more targets. The Planetary Society offers viewing guides.
Step 8: Connect with the Astronomy Community
Stargazing is more fun with others. Join local or online communities:
-
Astronomy Clubs: Share tips and access telescopes.
-
Citizen Science: Contribute to projects like Zooniverse, classifying stars or galaxies.
-
Social Media: Follow Galactic Guidance on X for updates.
Our Join Our Community page connects you with enthusiasts.
Conclusion: Start Your Stargazing Adventure
Observing stars without a telescope is an accessible, awe-inspiring way to explore the universe. With your eyes, a star chart, and a dark sky, you’re ready to begin. Galactic Guidance is here to support your journey—subscribe for more tips and explore our Astronomy Basics.
Step outside tonight, look up, and let the stars guide you.

